So I have a confession. I love ombre hair. If I had brown
hair (or could pull off brown hair) I would have been there a while ago. I’ve
watched and read a lot of tutorials on how to achieve this look, so you can
imagine my reaction when on Saturday I got a text from Rosie saying “want to
ombre dye my hair tonight?”
Now when most people think ombre they think this;
But Rosie didn’t want half a head of blonde,
but a more subtle look. I know three ways to ombre your hair, but the way I’m
outlining here is the most subtle, and also most fool-proof way to get ombre.
I learnt this technique when my friend Jessy turned up to lunch one day and I
didn’t even realize that she had dyed her hair at first, but when I did, I
loved it. “It’s like little bits of fire coming from the bottom of your hair.”
I kept saying. She didn’t like it, wasn’t like the picture she showed the
hairdresser at all.
Despite her lack of enthusiasm I think it’s a great way to get a bit of ombre
but not have to go the hole-hog. So stop typing Polly and get on with the
tutorialllllllllah.
__________________________________________________

First we cut Rosie’s hair cause she wanted it shorter. Obviously optional but I
thought I’d show you the pics because it was a lot of fun.
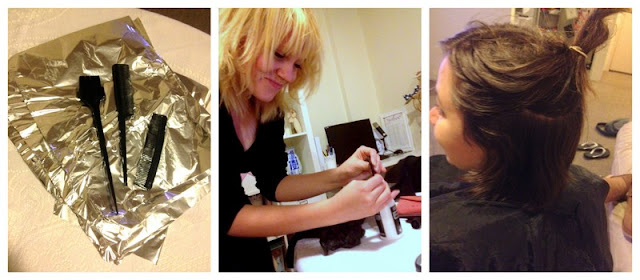
I used Loreal’s “Wild Ombres” dye which comes with
its own applicator bush and set of instructions. However I have my own brush
which I use to dye my hair and I find it pretty easy to use so I opted for that
instead. The good thing about this dye is that usually, if you use bleach on brown hair, it goes orange, and most blonde hair dyes aren't recommended for brown hair.

I also grabbed a rat-tail comb (up there in the middle in the left pic) which is great
for parting and teasing but you can also use a normal comb. The foil
was also realllllly helpful.
Then I followed the instructions to make the dye. I found it kind of hard using
the little tip at the end of the bottle to apply dye, so I ended up squeezing
the dye out onto a bit of plastic and then dabbing my brush in that. Kind of
like what you would do with paint and a paintbrush.
Then I parted Rosie’s hair and put what I didn't need away. Because her hair is
quite thick I ended up doing three lots of sectioning over the course of the
whole dying.

Next I grabbed about a 2
inch section of hair and teased it (moving the comb from the bottom to the top
of the strands) until about half of it was teased up.
I then put a piece of foil under the un-teased hair and painted the dye on. I
then folded the foil up to keep it out of the way.
Because Rosie only wanted a small section of her hair done I only did about 2
inches. This amount was a BAD - I'll explain why in a sec.

And then let another layer down, did the same, let another down, did the same
until walah! – Side Show Bob.

So the hard part was figuring out when to wash it out. Because obviously by the
time you’ve done the last foil, the first one is pretty much all done. To make
it kind of consistent I would start on one side of her head with one layer,
then on the other side of her head with the next layer. I just kind of kept
peeking under the foil until it looked roughly the same.
When it was done, she washed it out!
Okay, so here’s what we did wrong in this whole process. Rosie only wanted the bottom
2 inches or so ombre-d. So, I only dyed 2 inches. WRONG. Because of the nature
of the technique, it means that the hair you’ve teased eventually comes down
and covers the dyed hair, making it less intense. So even though I dyed 2
inches, it actually meant that the dye went from intense to non-existent in
that two inches. So it looked like just the very tips were dyed.

So we did the process again, just on the top layers, and this time I dyed about 4 inches. And even though above the end product looks like solid blocks of colour, the teasing means that it ends up gradual. As you can see below the colour starts and fades in that four inches.

So
here’s Rosie with her hot new hair!
Using this technique also means that it doesn't end up as a
block of colour that fades together, but that some pieces go further up than others.
And the before and after shots;

If you want to try it on longer hair, then obviously, just increase the amount
that you dye it. If you’re worried, do less and just be prepared to have
another bash!
__________________________________________________
Let me know what you think of this look!


Such a fun experience! You explain the process really well, so hopefully more people will give it a try!
ReplyDeleteNow .. just to accept the fact that there are 5+ photos up on the internet with me looking like a slightly crazed sideshow bob :)
Love ya!